FreeFileSync 一款开源的文件同步软件
FreeFileSync 用户手册:
#快速开始
命令行使用
文件对比设定
夏令时设置
排除文件(夹)
专业设置
调用外部程序
脚本应用
性能优化
实时同步
RTS: 作为服务运行
计划任务批量运行
同步设置
(S)FTP Setup
使用小技巧
可变盘符设置
版本控制
整盘复制
计划同步任务
- 在 FreeFileSync 主窗口创建一个同步任务配置文件: 菜单 → 文件 → 保存配置文件
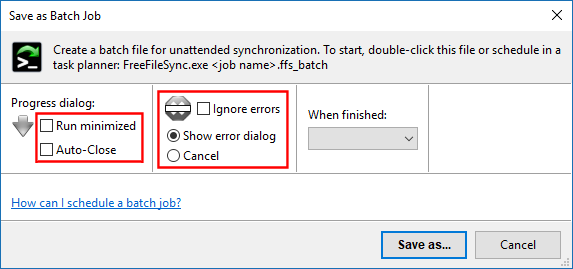
- 默认情况下,FreeFileSync将在同步期间显示一个进度对话框
将在显示摘要对话框时等待。
如果不需要“进度对话框”,请启用Checkbox运行最小化,并设置自动关闭,如果您想在末尾跳过摘要对话框。
Note
即使开始时未显示进度对话框,您也可以通过双击通知区域中的freefilesync图标在同步期间任何时候可见。
- 如果您不希望错误或警告消息在没有用户响应时停止同步,请
检查忽略错误或设置取消以在第一个错误中停止同步。
- The FreeFileSync batch job can be started by double-clicking on the
ffs_batch file or
it can be set up in your operating system's scheduler:
Note
Be sure to enable Auto-Close and Ignore errors/Cancel if you schedule the ffs_batch file to run under a different user account. With no one there to close the results dialog manually, the task would hang indefinitely.
Be sure to enable Auto-Close and Ignore errors/Cancel if you schedule the ffs_batch file to run under a different user account. With no one there to close the results dialog manually, the task would hang indefinitely.
Windows Task Scheduler
- Open the Task Scheduler either via the start menu, or enter taskschd.msc in the run dialog (keyboard shortcut: Windows + R).
- Create a new basic task and follow the wizard.
- Make Program/script point to the location of FreeFileSync.exe and insert the
ffs_batch file into Add arguments.
- Use quotation marks to protect spaces in path names, e.g. "D:\Backup Projects.ffs_batch"

备注
- Program/script always needs to point to an executable file like FreeFileSync.exe even when the ffs_batch file association is registered. If an ffs_batch file was entered instead, the task would return with error code 2147942593 (0x800700C1), "%1 is not a valid Win32 application".
- If you schedule FreeFileSync to run under a different user account, note that the configuration file
GlobalSettings.xml will also be read from a different path,
C:\Users\<username>\AppData\Roaming\FreeFileSync,
or in the case of the SYSTEM account from
C:\Windows\System32\config\systemprofile\AppData\Roaming\FreeFileSync.
You can force usage of a particular GlobalSettings.xml file by passing it as a 命令行使用 parameter.
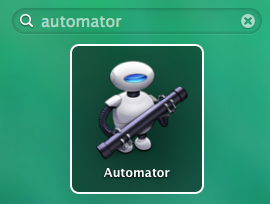
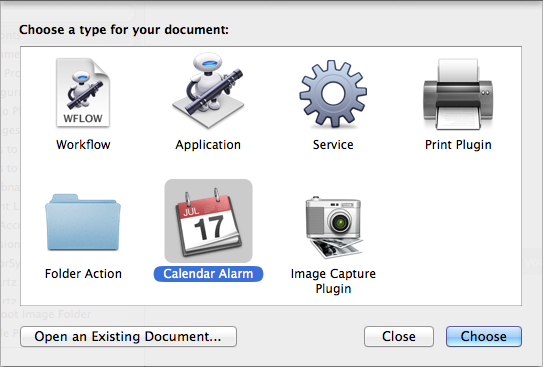
macOS Automator and Calendar
- Open Launchpad and run Automator.
- Create a new Calendar Alarm.
- Drag and drop the ffs_batch file on the workflow panel.
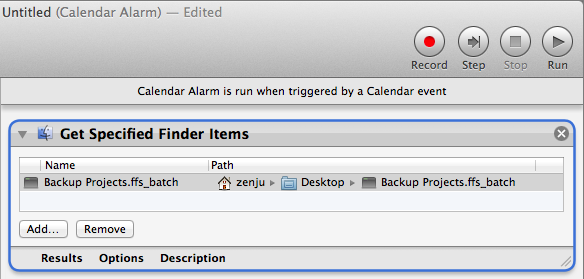
- Drag and drop action Files & Folders/Open Finder Items and add it to the workflow.

- Go to File → Save... and save the Automator job.
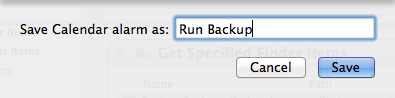
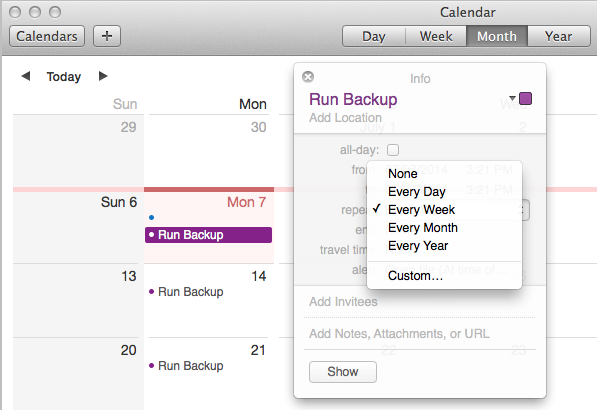
- The Calendar app will start automatically with the Automator job scheduled to the current day. You can now select a different time for synchronization or make it a recurring task.
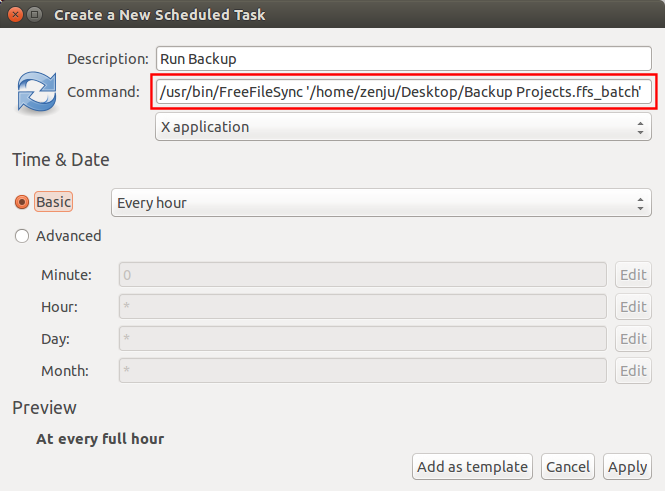
Ubuntu Linux Gnome Scheduled Tasks
- Install Gnome-schedule if necessary: sudo apt-get install gnome-schedule
- Search the Ubuntu Unity Dash for Scheduled tasks
- Enter the command:
<FreeFileSync installation folder>/FreeFileSync <job name>.ffs_batch
- Select X application since FreeFileSync requires access to GUI